How to configure Managed MetaData Service in SharePoint 2010?
OR
What is Managed MetaData Service?
MetaData:- Before to understand this service, we need to understand
MetaData. MetaData in simple words "data about data". All data files keeps some MetaData properties such as:
a). Which way we create the data file?
b). What is the purpose of data file?
c). When we create the data file? (Time and Date specifically)
d). How creates the data file? (Creator or Author)
e). Where the data file is located? (local computer location or network location)
NOTE: These are most common MetaData properties.
Managed MetaData Services:- To understand the Managed MetaData Service, we need to understand following main things "
Term Store", "
Term" and "
Term Set".
Term Store : This is the database, where our managed meta data get store.
A "
Term" is word or phase that can be associated with an item in SharePoint 2010. e.g.
A "
Term Set" is bunch of related terms.
How to configure Managed Metadata Service in SharePoint 2010?
OR
What is Managed Metadata Service?
Metadata: - Before to understand this service, we need to understand Metadata. Metadata in simple
words "data about data". All data files keep some Metadata properties
such as:
A). which way we create the data file?
b). what is the purpose of data file?
c). When we create the data file? (Time and Date specifically)
d). How creates the data file? (Creator or Author)
e). where the data file is located? (Local computer location or
network location)
NOTE: These are most common Metadata properties.
Managed Metadata Services: - To understand the Managed Metadata Service, we need to
understand following main things "Term Store", "Term"
and "Term Set".
Term Store: This is the database, where our Managed Metadata get
store.
A "Term" is word or phrase that can be associated
with an item in SharePoint 2010. e.g.
A "Term Set" is bunch of related terms.
Terms can be divided into two types.
Managed Term: Generally its pre-defined terms. It can only be created by
user with appropriate permissions, and are often organized into hierarchy.
Enterprise Keyword Term : These are simply words or phrase that,
have been associated to SharePoint Server 2010 items. All enterprise keywords
are part of a single, non-hierarchical Term Set called it keyword set.
How to configure Managed Metadata services step by step?
1.1 Create a site collection for content hub.
Steps: - Go to the Central Admin site and click on "Create
Site Collection"
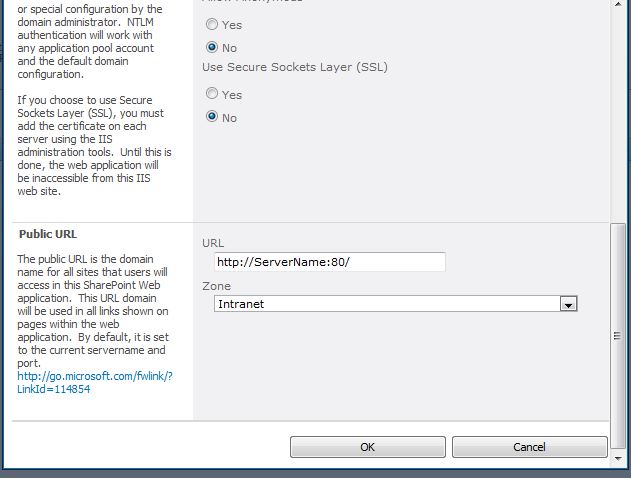
1.2 Choose Web Application Name, Site
Collection Name, URL, Site Template and Site Collection Admin. If we want, we can also define some storage quota also.
1.3 Click on OK. The site collection has
been created. It will provide us the URL. e.g. http://<web-application
name>/sites/CTH/.
2.1 Now we need to create Manged metadata service.
2.1 Go to Central Admin page and click on
"Manage service applications"
2.2
Click on "New" and then click on "Managed Metadata Service"
2.3 Then we need to fill the following
information
Service Application Name :
TestManagedMedaDataService
Database Server Name
: Databaseservername (We need to here our database
server name).
Database Name
: TestManagedMedaDataService
(As per best practice we
put database Name as per service name).
Database
authentication : Windows authentication
Failover Server
(Optional) : If we have configured any failover server, we can
mentioned it here.
Application pool
: We used our shared
application pool "SharePoint Web
Services" for this Service. If we want we can
use
different application pool for this service.
Give register service account.
Content Type HUB
: http://webapplicationname/sites/CTH/
(type the site
collection name that we
Have created in first (1.1)
step.
Then select the both check
boxes
"Report syndication
import errors from Site Collection
using this service
Application" and
"Add this service
application to the farm default list".
Then Click on "Ok" and our
service application has been created.
3.1 Check site collection hub is added and the service application
is default storage
location for column specific term sets.
3.1 Select the "Managed Metadata Service Application"
and click on "Properties"
3.2 Check the all following boxes.
Check "The service application is the
default storage location for keywords."
Check "This service application is the
default storage location for column specific
term sets."
Check "Consumer content types from the
Content Types Gallery at
http://webapplication/sites/CTH.
Check "Push-down Content Type Publishing
updates from the Content Type Gallery
to sub-sites and Lists using the content type."
Click on "OK".
4.1 Open Term store management tool and create term set and then
term.
4.1 Select the "Managed Metadata Service Application"
and then click on "Manage".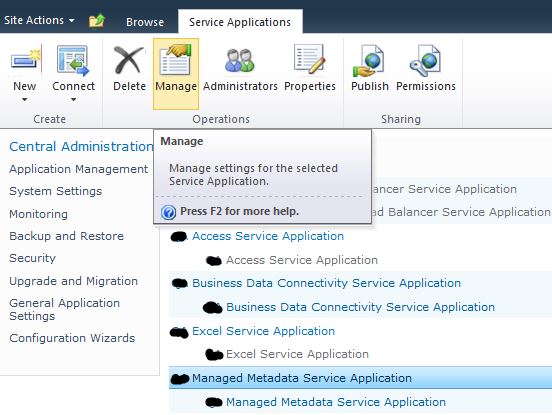
4.2 Create a "New Group" and
verify the following two things.
Available Service Applications :
Managed Metadata Service Application
Term Store
Administrator : add our user name
(abc\username)
4.3
Create a group and give a name. e.g.: Applications
4.4 Create a Term Set.
We have created here following Term Set
inside the "Applications" group.
1. Microsoft
2. IBM
3. Oracle
4.5 Then create Terms inside the
"Term Sets"
We need to create
following structure.
Application
Microsoft
Active Directory
Exchange
SharePoint
IBM
Lotus
Tivoli
Think Pad
SUN
Java
Java EE
Tomcat Server
4.6 If we want, we can set some
"Other Labels" on our Terms. e.g.
SharePoint: MOSS
2007, SharePoint Server, SharePoint 2010 and etc. (These
keywords do work as Aliases) and then "SAVE" it.
4.7 Then we need to create keywords.
Such as: Training,
Demos, Practice, Applications, Software and testing etc. (Which
words we use in our organization).
Now the Managed Metadata Service has been configured.
How to use Managed Metadata Column in
List.
5.1 Create a Custom List and then create a
Managed Metadata Column with following information.
Column Name: Course
Offers
Multiple Value Field:
Check on Allow multiple value
Display format
: Select on Display the entire path to the term in the
field.
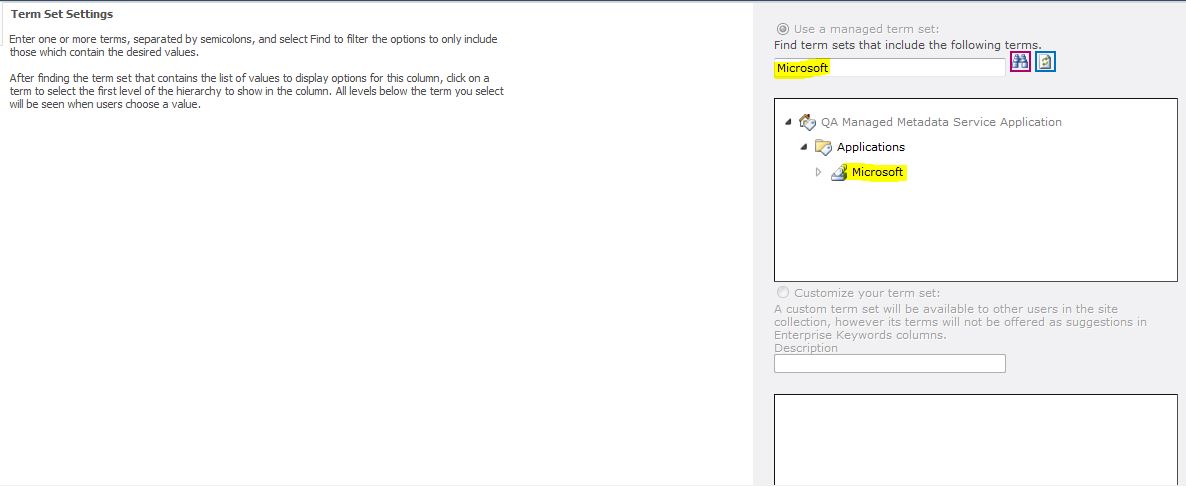
Term Set Settings
: Select on "Use a managed term set" (We can search here
in our
terms by Keywords)
Default Value
: SharePoint (Choose any term as our default
value).
Click on
"OK" and save this column.
5.2 Now we can create an item and save. As we can see
in this below screenshot. We just
write "sha" and it automatically picked the main course name.
Wish you good luck!! :)