What is extended application in SharePoint 2010?
Extend a Web application: - This is a very interesting feature of SharePoint. Suppose we have 1 web application and, we want to use 2 different URL for different audience or with different authentication. Then we need to extend a web application in to a new zone. We call it "Extend a Web application".
Now you must be wondering, How to do it?
1. We need to create a separate Internet Information Services (IIS) Web site to serve the
same content, but with unique URL and authentication type.
2. An extended web application can use up to 5 network zone (Default. Intranet, Internet,
Extranet, Custom). We can use two different zones for same application to providing
different authentication.
3. We need to identify for which authentication we would use into extended web
application.
application.
Let’s choose it Windows-classic Authentication.
How to extend a web application with Windows-classics Authentication step by step?
1. The user must be member of farm administrator SharePoint group and the member of
local administrator group on the computer running Central Administration.
2. Then click on "Manage Web Applications"

3. Then select the web application that you want to extend.

4. Then click on Extend.

5. On the "Extend Web Application to another IIS Web Site". You need to fill
following information.
A). select "Use an existing IIS web Site"
b). in the "Port" section, this field will be populated by current port number.
c). in the "Host Header" section, this field is optional. You can type host name
(www.abc.com) in this box.
That you want to use for access the web application.
NOTE: Generally this field not set, unless you want to configure two or more web
sites same port number on the same server and DNS has been configured to multiple
server names to the same server.
e). in the "Path" section, this field is populated with the current path of that Web site.
f). in the "Security Configuration" section, you need to configure authentication
and encryption for your Extended Web application.
g). in the "Authentication Provider" click on "NTLM"
h). in the "Allow Anonymous" section, click on "NO"
i). in the "Use secure socket layer" section, click on "NO"

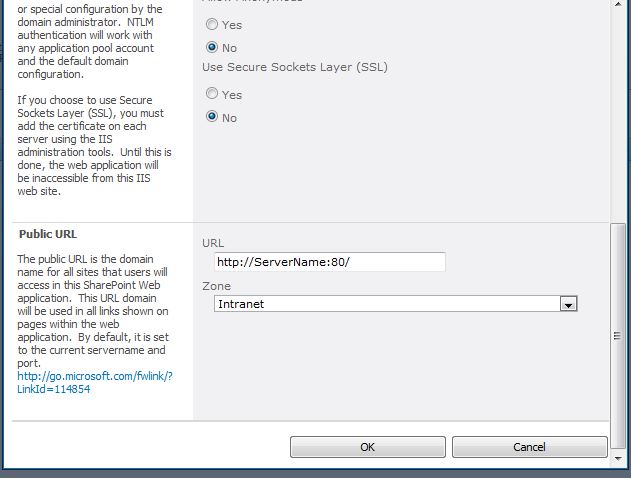
j). In the "Public URL" section, you need to type the domain name for all sites that user will access in this
Web application. This URL will be used as the base URL in links shown on pages with in this web
application zone.
h). In the "Public URL" section, select the zone to use for the application.
(You can choose FIVE different zones for ONE Web application)
Click on OK and our Web application has been extended.
0 comments:
Post a Comment