How to configure secure store service?
ahm !! Secure Store Service as the name defined it. This service store some security related content.
In technical words, The secure store service provides a database that is used to store credential. these credentials usually keeps user identity (user id) and password, but also can keep other fields that you define. For example : SharePoint 2010 can use secure store service database for access the external database. We can use this service in following applications.
1). Excel service
2). Visio Service
3). Performance Point Services
4). PowerPivot from SharePoint 2010
5). Microsoft Business Connectivity Service
1). We need to follow following steps to configure secure store service.
1.1). Create a separate user account in Active Directory for Secure Store Service.
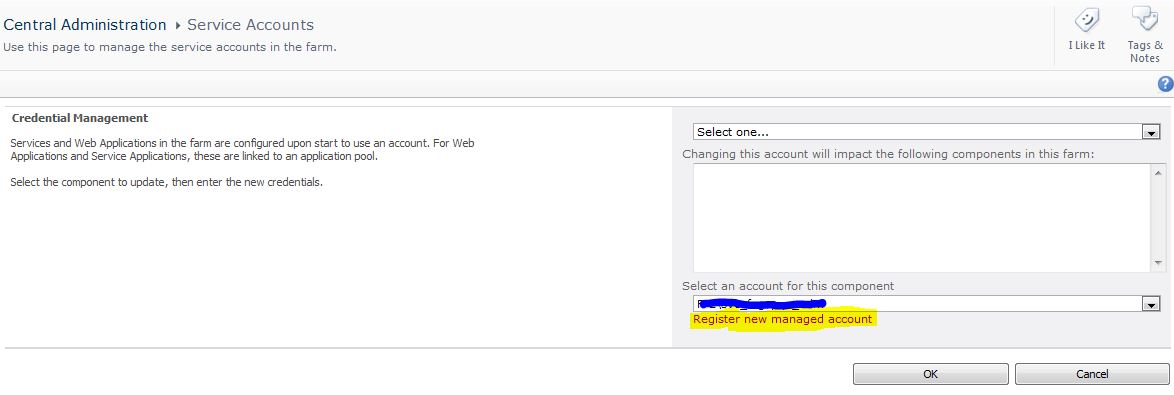
1.2). Go to Central Admin site and Click on "Configure Service Account".
 1.3). Click on "Register new managed account"


Enable Audit : 30 days (Your log will be store for 30 days max)


3). Working with encryption key
3.1). Click on "Secure Store Services"


4). Create a Target Application
4.1). Click on 'New"


In technical words, The secure store service provides a database that is used to store credential. these credentials usually keeps user identity (user id) and password, but also can keep other fields that you define. For example : SharePoint 2010 can use secure store service database for access the external database. We can use this service in following applications.
1). Excel service
2). Visio Service
3). Performance Point Services
4). PowerPivot from SharePoint 2010
5). Microsoft Business Connectivity Service
1). We need to follow following steps to configure secure store service.
1.1). Create a separate user account in Active Directory for Secure Store Service.
1.2). Go to Central Admin site and Click on "Configure Service Account".

2). To configure Secure Store Service
2.1). Click on "Manage Services On server"

2.2). Choose the server name where you want to start secure store service and the start the service.
2.3). Then go to Central Admin Site and click on "Manage Service Applications"
2.4). Click on "New" and select "Secure Store Service"
2.5). "Create New Secure Store Service Application" and fill the following information.
Service Application Name : Secure_Store-Service_Name
Database Server : Give you Database Server Name
Database Name : Secure_Store-Service_DBName
Database authentication : Windows Authentication
Failover Server : Optional If you created any failover server please specify here
Create New Application Pool : Secure_Store-Service_APName
Select Security account : Give your registered service account for thisEnable Audit : 30 days (Your log will be store for 30 days max)
Then Click on "OK"
3.1). Click on "Secure Store Services"
3.2). Click on "Generate New Key"
3.2). Provide the "Pass Phrase Key" e.g. ABC@123 and then confirm it.
and then click on "OK"
4.1). Click on 'New"
4.2). Fill the following information and then click on"Next"
Target Application ID : TestAppID
Display Name : TestApplication
Contact E-mail : abc@xyz.com
Target Application Type : Group
Target Application Page URL : leave it blank

Then Click on "Next".
4.3). now here you can specify the credentials details fields for your secure store target application.
let me describe you the YELLOW fields.
Add Fields :
From here you can add fields. such as Generic, User Name, Password, PIN, Key, Windows User Name, Windows Password.
Field Name : Here you need to define specify field name. such as if you choose "Windows User Name" then type it.
Field Type : Here by drop down arrow you can set the "Field Type". Such as Generic, User Name, Password, PIN, Key, Windows User Name, Windows Password.

Then Click on "Next".
4.4). Add the "Target Application Administrator" and "Member"
Target Application Administrator : <Type the UserName>
Members : <Type the Members Name>

5). Set credential for a target application
5.1). Check the Target Application and click on "Set Credentials"

5.2). Now you can type the "External Data Source User Name and Password"
This way your External Data Source and Windows Credentials goes mapped.

Note : If the target application is of type Group, type the credentials for the external data source. Depending on the information that is required by the external data source, the fields for setting credentials will vary.
If the target application is of type Individual, type the user name of the individual who will be mapped to this set of credentials on the external data source, and type the credentials for the external data source. Depending on the information that is required by the external data source, the fields for setting credentials will vary.
0 comments:
Post a Comment